 Pin it
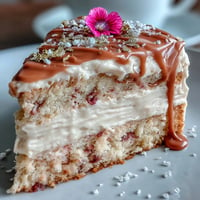
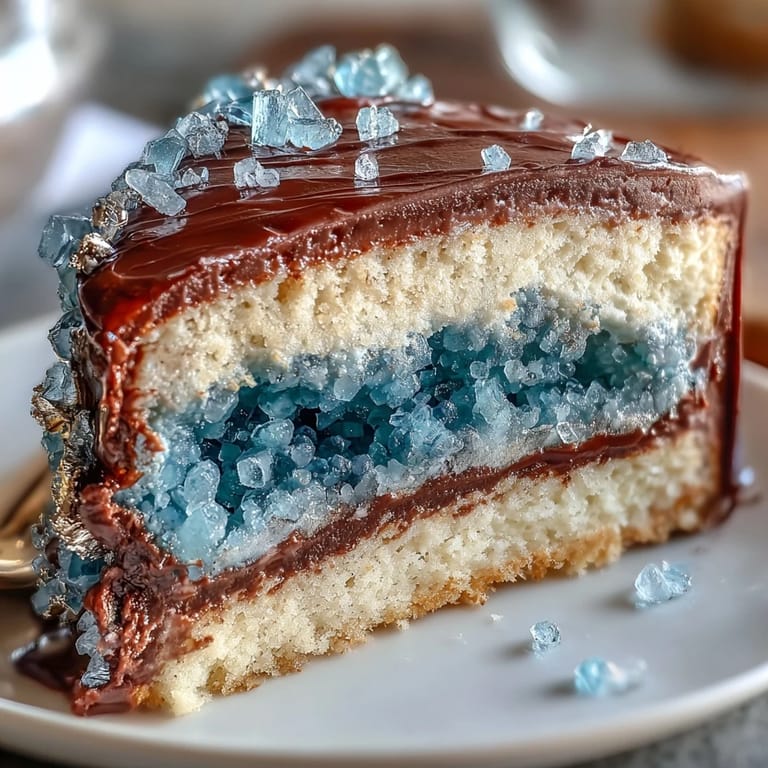
 The first time I settled on making a graduation cake with a teal and gold geode design, my kitchen felt more like an artist’s studio than a bakery. The sunlight caught the sugar crystals scattered across my countertop, casting bright flecks on the white tiles. I remember humming along absentmindedly to the playlist my sister had compiled for the occasion, every song building energy as I mixed, tinted, and frosted. It’s funny how such a bold, show-stopping cake grew out of a simple desire to celebrate in a way that felt both elegant and playful. The combination of color and sparkle practically demanded a reason to gather and cheer.
Decorating the geode slice felt like a group project—my friends offered opinions on everything from crystal placement to gold leaf accents, and someone always managed to sneak a taste of the buttercream. There was plenty of laughter when we misjudged the amount of colored sugar needed, leading to an impromptu sugar dyeing session right before guests arrived. In the end, the cake became as much a part of the celebration as the speeches and tearful hugs. Even our neighbor stopped by just to admire the shimmering gold edges and to ask for a slice. Baking it together definitely set the tone for an unforgettable graduation party.
Ingredients
- All-purpose flour: Sifting ensures the cake stays airy and light—I learned to never skip this step after one heavy attempt.
- Baking powder: Gives rise and fluffiness; always double-check freshness for the perfect bake.
- Salt: Balances sweetness and makes the vanilla flavor shine—don’t underestimate what a pinch does.
- Unsalted butter: Room temperature butter blends smoothly and sets a rich foundation for both cake and buttercream.
- Granulated sugar: Creamed properly, it helps create a soft crumb; a minute more mixing makes all the difference.
- Eggs: Make sure they’re room temperature—they emulsify perfectly, preventing curdled batter.
- Vanilla extract: It’s the soul of the cake; pure vanilla deepens aroma and flavor.
- Whole milk: Adds moisture while keeping the cake tender—I use it straight from the fridge after warming briefly.
- Powdered sugar: Sift it for your buttercream to avoid lumps and ensure silky-smooth icing.
- Heavy cream or milk: Adjusts the buttercream’s consistency; just a splash at a time prevents over-thinning.
- Teal gel food coloring: This packs pigment without affecting texture—I build color slowly for control.
- Rock sugar crystals: Clear or white crystals mimic geodes; coloring them properly is key to a natural effect.
- Edible gold leaf or luster dust: The metallic finish elevates the cake from pretty to dramatic—use a steady hand for clean edges.
- Simple syrup: Optional, but brushing layers keeps them moist for days; it’s my secret weapon when baking ahead.
Tired of Takeout? 🥡
Get 10 meals you can make faster than delivery arrives. Seriously.
One email. No spam. Unsubscribe anytime.
Instructions
- Start the Vanilla Cake:
- Grease, line, and preheat your pans—there’s a satisfying sizzle when butter meets parchment. Whisk together dry ingredients so every bite is uniform, then cream butter and sugar until pale and fluffy—set your mixer on medium so you don’t rush texture.
- Add Wet Ingredients:
- One by one, let eggs slip in and blend until smooth, before stirring in vanilla. Alternate dry mix and milk, watching the batter turn glossy and light as you go.
- Bake and Cool:
- Divide batter between pans, and tap gently to settle air; bake until the tops spring back to a gentle touch. Let cakes cool in the pans for just 10 minutes, then run a knife around the edge before transferring to a rack—the room fills with warm, sweet aromas.
- Make the Buttercream:
- Beat butter until velvety, then slowly add powdered sugar and scrape the sides, ensuring little pockets of sweetness don’t hide. Splash in vanilla and cream, adjusting till the frosting is spreadable, and tint most with teal gel—save a little plain for crumb-coating.
- Color Sugar Crystals:
- Drop gel coloring into rock sugar and gently fold until hues swirl and deepen; dry them briefly on parchment before using. I let my fingers get a little sticky and admire how the teal shade pops.
- Assemble the Layers:
- Level cooled cakes, brush with simple syrup if you like, and sandwich layers with buttercream. Apply a thin crumb coat, chill for 20 minutes, then frost fully with teal buttercream—smooth sides and top for a canvas-like finish.
- Carve and Decorate:
- Cut a wedge out of the cake and coat the cavity with buttercream. Press in sugar crystals, layering light in the center and dark around the edges, then carefully paint borders with gold leaf; the results are striking.
- Finishing Details:
- Add extra gold accents and, if you wish, top with a graduation decoration. Step back for a moment to admire your handiwork—it’s always worth the pause.
 Pin it
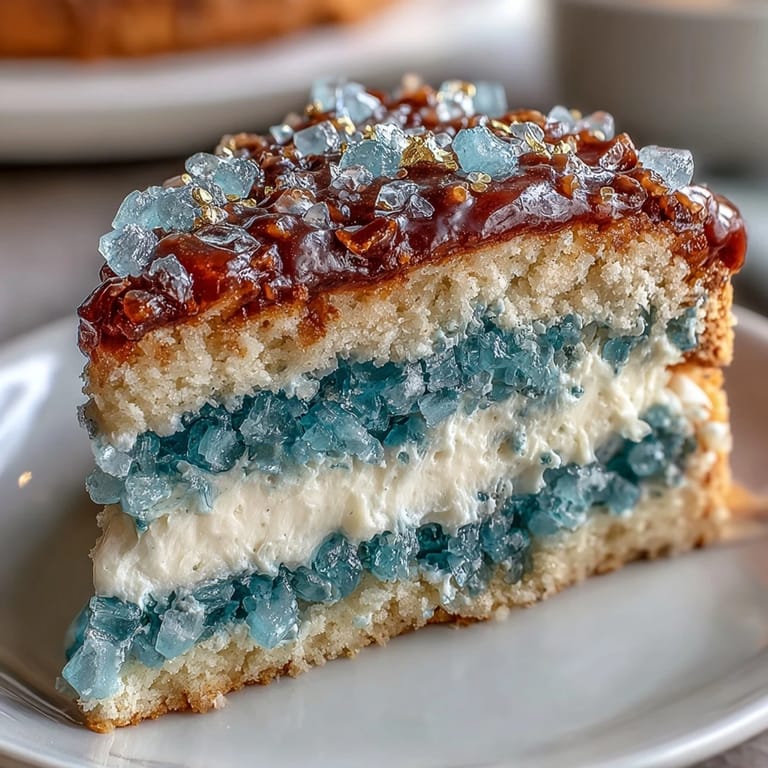
 When the cake made its way to the table, the sense of accomplishment rippled through everyone present. It wasn’t just the bold teal or the glimmering gold that caught attention—people genuinely paused to admire each detail, making the day feel even more special. The photo from that moment still makes me smile whenever I see it.
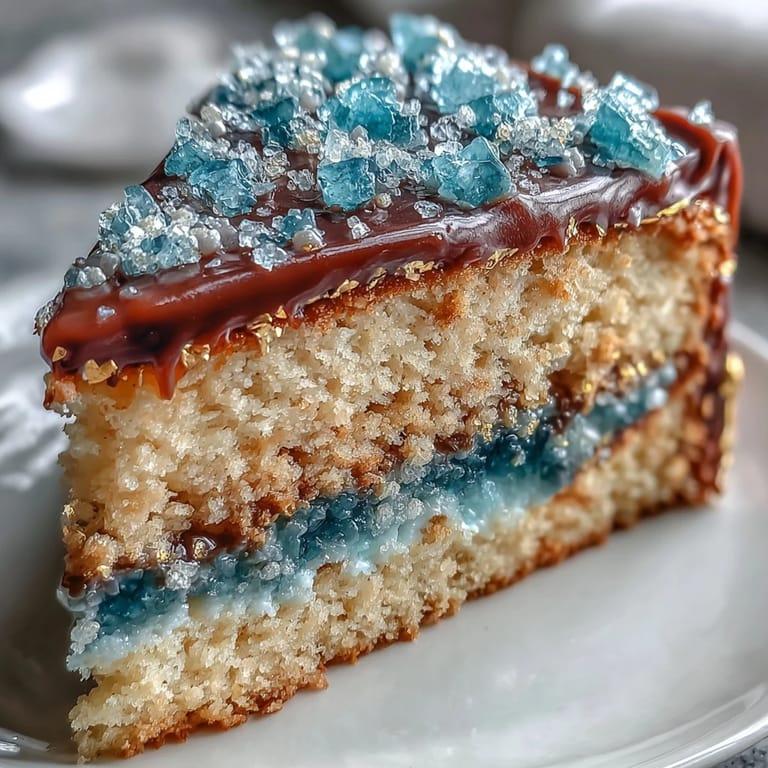
How to Master Geode Decoration
Getting the geode look just right always involves patience and a steady hand. I’ve found it helps to sketch the shape of the cut-out area first, so the crystals follow a natural, jagged edge. Layering the sugars from lighter to darker creates depth and helps mimic nature—don’t be afraid to experiment with your color blend. Each time I make this cake, the geode slice turns out unique, and guests are drawn to the artistry of the crystal interior. The gold paint edges bring out every shimmer, turning mistakes into design twists.
Choosing the Right Food Coloring
Gel food coloring is essential here since it won’t thin your buttercream or sugar crystals. I’ve tried using liquid coloring before, but it changed the consistency and dulled the vibrancy—stick with gels for vivid results. A blend of teal and blue shades gives more dimension than a single color, while mixing gently ensures an even finish. Sometimes, just a drop more blue can shift the mood of the entire cake, so adjust slowly and pause between additions. Vibrant colors truly capture the festive spirit.
Troubleshooting Cake Assembly
Sometimes layering cakes leads to uneven stacks, so I always use a serrated knife to level each one. Chilling the crumb coat keeps buttercream from sliding under the weight of the decorations, making the sculpted wedge much easier to carve. Working with sugar crystals is messy but fun—lay a sheet of parchment under your work to save cleanup time. Covering exposed areas quickly with buttercream prevents dryness.
- Don’t forget to have extra buttercream on hand for patching mistakes.
- Decorate the geode just before serving for freshest sparkle.
- If the gold leaf tears, gently patch it—imperfections only enhance the artistry.
 Pin it
 Whether for graduation or any special moment, this teal and gold geode cake invites creativity and celebration. Share it proudly—every slice is a piece of accomplishment and artistry.
Recipe FAQs
- → How is the geode effect created?
Sugar crystals are tinted teal and arranged in a carved cake slice, then painted with edible gold for depth and sparkle.
- → What flavors are used?
Classic vanilla forms the base, but lemon or almond extract can be added for variation and extra aroma.
- → How many layers does the cake have?
This design uses three 8-inch round layers for impressive height and structure.
- → Can color variations be made?
Yes, mixing teal and blue food coloring for sugar crystals adds dramatic hues to the geode centerpiece.
- → What tools are needed?
You'll need an electric mixer, round cake pans, offset spatula, parchment paper, serrated knife, and food-safe paintbrush.
- → Is this suitable for vegetarians?
Yes, the cake uses eggs and dairy, but no meat or gelatin, making it a vegetarian-friendly dessert.