Pin it
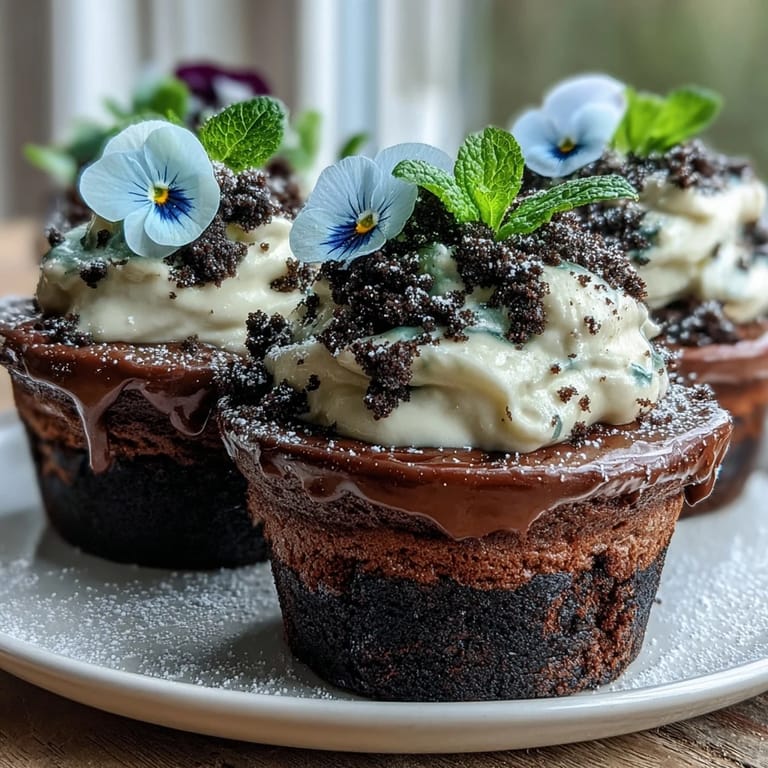
 There’s something wildly satisfying about assembling desserts that look like something they’re not—especially when the “soil” crunches, the “flowers” are edible, and the whole thing brings a grin to everyone’s face. The first time I made these Mother’s Day Flower Pot Brownies, I was chasing that simple delight, and my kitchen ended up looking like a candy florist shop. The subtle scent of cocoa and butter mingled with fresh mint I’d picked from a jar on the windowsill, and somehow, the heart of the celebration felt right in that cheerful mess. By the time the edible pansies were pressed on top, I was chuckling at my own ambition but too enchanted to care. It’s one of those desserts that brings joy before anyone’s even taken a bite.
One spring, my sister and I quietly tried to one-up each other decorating each flower pot, giggling as we debated whether our mom would prefer classic violets or playful jelly candies overhead. The brownies cooled by an open window, attracting the nose of our family dog, and for a fleeting moment, we all hovered in the kitchen, eager and proud, comparing creative “arrangements”.
Ingredients
- Unsalted butter: Gives an irresistibly rich base to the brownies; for extra flavor, melt it gently so it doesn’t scorch.
- Granulated sugar: Sweetens the brownies beautifully and helps their edges get chewy.
- Large eggs: Essential for moist, fudgy texture—let them come to room temperature for easier mixing.
- All-purpose flour: Just enough to hold everything together without drying things out.
- Unsweetened cocoa powder: Provides deep chocolate flavor; sift it to avoid lumps.
- Baking powder: A touch gives the brownies a lighter crumb.
- Salt: Don’t skip it! A pinch makes the chocolate pop.
- Vanilla extract: Rounds out all the flavors; the better the vanilla, the warmer the aroma.
- Oreo cookies: These are the magic “dirt”—crush them to your preferred chunkiness for texture.
- Heavy cream: Whipped until fluffy, makes the “grass” that holds your garden upright.
- Powdered sugar: Sweetens the cream invisibly and sturdily.
- Edible flowers or gummies: The show-stopping decoration—play with color and shape for max charm.
- Fresh mint leaves (optional): A leafy flourish and a lovely scent when you take that first bite.
Tired of Takeout? 🥡
Get 10 meals you can make faster than delivery arrives. Seriously.
One email. No spam. Unsubscribe anytime.
Instructions
- Prep your pots:
- If using oven-safe flower pots, line the bottoms with parchment rounds so the brownies don’t stick; otherwise, be ready to cut the finished brownies to size.
- Start the brownies:
- Melt butter gently until just dissolved, then take it off the heat and whisk in sugar and vanilla for a glossy, fragrant base.
- Add eggs:
- Stir in eggs, one by one, whisking until the mixture is thick and smooth, like chocolate custard.
- Add dry ingredients:
- Sift flour, cocoa, baking powder and salt together and fold gently into the wet mixture, just until no dry spots remain.
- Portion and bake:
- Spoon the batter into pots or a lined tray and bake until the top is shiny and a toothpick emerges with a few moist crumbs—don’t overbake or you’ll lose the fudgy middle.
- Cool completely:
- Try to resist sneaking a bit while the brownies firm up, which makes them easier to unmold and decorate.
- Make Oreo dirt:
- Pulse Oreos in a food processor or bash in a bag with a rolling pin; aim for a soil-like mixture with a hint of chunkiness for authenticity.
- Whip the cream:
- Beat heavy cream with powdered sugar until stiff peaks hold, being careful not to over-whip or it’ll go grainy.
- Assemble layers:
- If you used a tray, cut cooled brownies to fit your flower pots, nestling them at the bottom.
- Add cream and dirt:
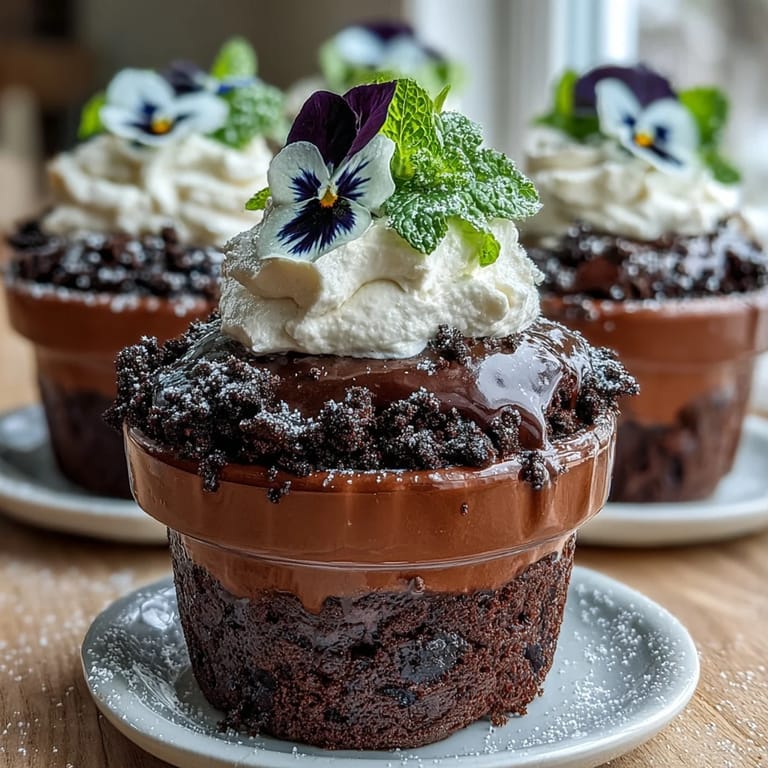
- Spread a cloud of whipped cream on each brownie, then scatter with plenty of Oreo dirt so none of the cream shows through.
- Decorate:
- Plant edible flowers or candies “growing” out of the crumbs, adding mint leaves if you want extra green.
- Chill and serve:
- Refrigerate until you’re ready to surprise everyone—these pots are showstoppers straight from the fridge.
 Pin it
 The best part was watching my mom’s face light up when she realized each “plant” was edible. My nephews gleefully picked mint leaves and candies, announcing whose pot was the most realistic—proving dessert can become the highlight of any family get-together, not just a sweet ending.
Choosing and Using Edible Flowers
Edible flowers add a hint of spring and elegance, but they’re not all created equal—some pack more flavor while others are pure decoration. Take care to buy food-safe blooms from reputable sources (never the florists up the street), and always triple-check with your grocer. Violets and pansies are my picks for color and subtle taste, but try nasturtiums or marigolds for peppery notes if you’re feeling bold.
Make-Ahead Magic
The flower pots and Oreo dirt can easily be prepped the night before—just hold off on final assembly and decoration till the day of for best results. If you whip the cream ahead, re-whisk it gently before spreading to revive its fluffiness and keep everything sturdy.
Troubleshooting and Fun Variations
Swapping in store-bought brownie mix will save time on a hectic morning and still taste fantastic. Experiment with adding mini chocolate chips, nuts, or even crushed freeze-dried berries to the batter for little surprises with every bite.
- Wipe the rims of each pot before decorating for tidiness.
- If the brownies sink a bit while cooling, top them with extra whipped cream.
- Always check brownies for doneness a few minutes early if your flower pots are smaller than suggested.
 Pin it
 However you decorate them, these flower pot brownies promise a moment of joy and a goofy smile at the table. They’re garden party magic, right from your kitchen.
Recipe FAQs
- → Can I use store-bought brownie mix?
Yes. A boxed mix speeds preparation—follow package directions and bake in pots or a tray, then cut to fit. Homemade batter just offers a richer cocoa flavor if you prefer.
- → Are oven-safe flower pots necessary?
Oven-safe mini pots create the cutest presentation, but ramekins or a lined baking tray work fine. If you bake in a tray, cut cooled brownies to fit the pots before topping.
- → How do I make the Oreo 'dirt' very fine?
Pulse Oreos in a food processor until powdery. If using a bag and rolling pin, crush in small batches and sift larger pieces out for a finer, more soil-like texture.
- → Which edible flowers are safe to use?
Choose food-safe varieties like violas, pansies, or calendula from reputable suppliers. Avoid flowers sprayed with pesticides and always confirm edible status before garnishing.
- → Can these be made ahead of time?
Yes. Bake and cool the brownies a day ahead. Whip cream and assemble no more than a few hours before serving to keep the topping firm; assembled pots can be chilled briefly.
- → How should leftovers be stored?
Cover and refrigerate assembled pots for up to 2 days. Whipped cream may soften the crumbs over time, so for best texture, store toppings separately and assemble shortly before serving if possible.