 Pin it
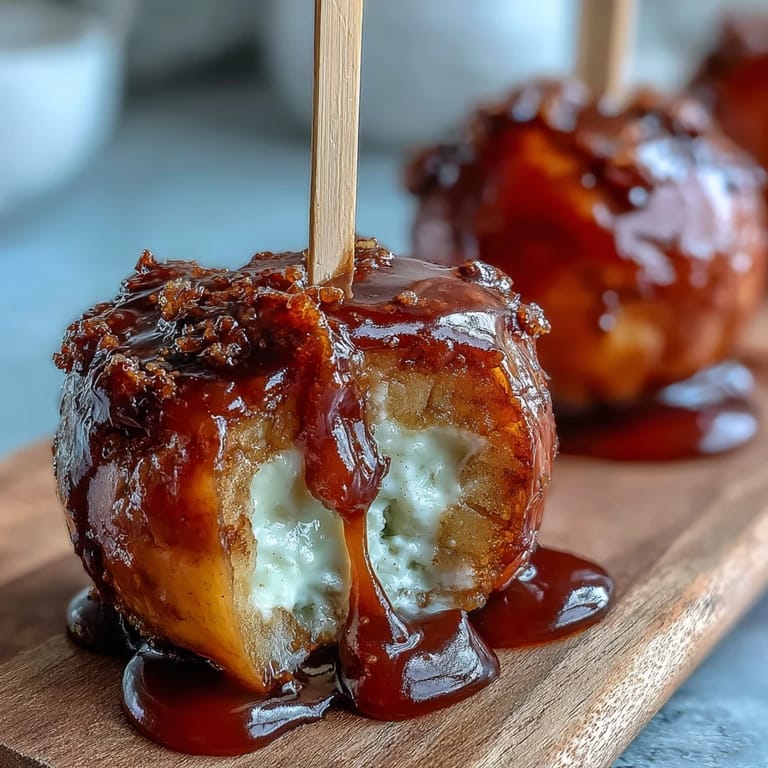
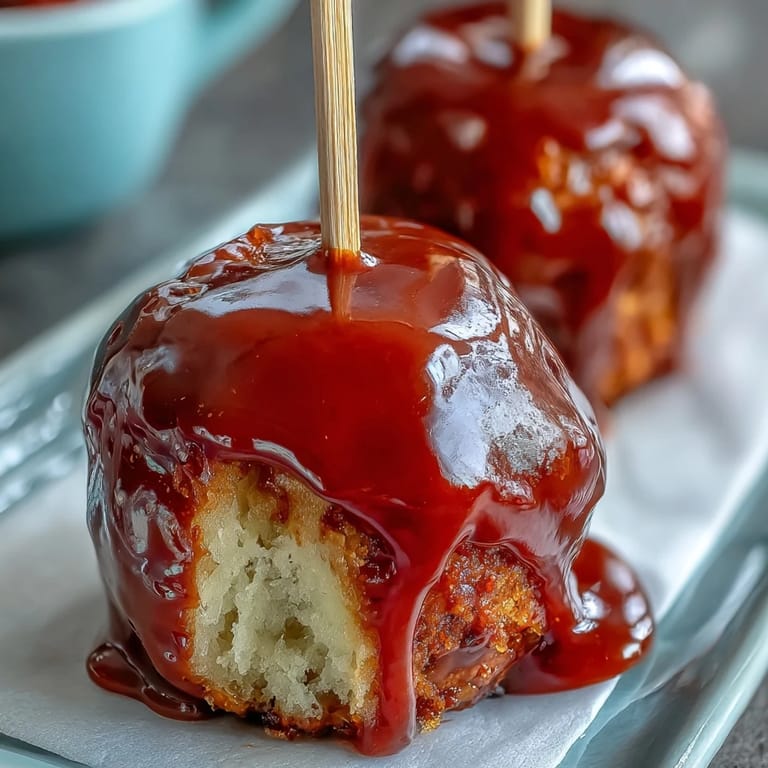
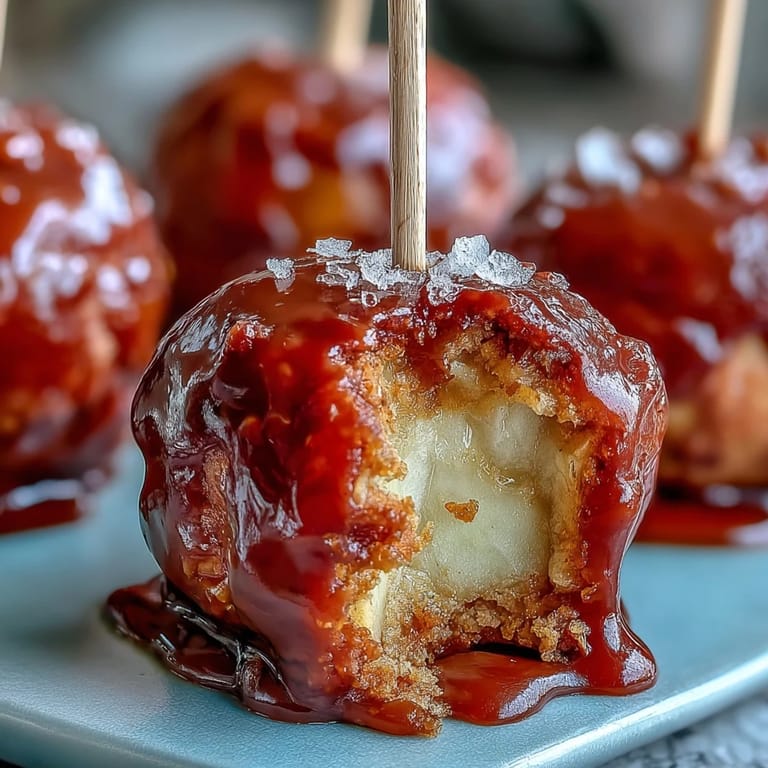
 My neighbor threw together this brilliant last-minute dessert for a block party years ago, and I watched her work with the kind of quiet confidence that only comes from knowing something will turn out perfectly. She'd slice apples, spike them with toothpicks, and dip them into this bubbling pot of scarlet candy coating that looked like liquid rubies under her kitchen light. By the time guests arrived, there was nothing left but sticky toothpicks and people asking for the recipe, which she laughingly admitted she'd invented five minutes before deciding to make it.
I made these for my daughter's school bake sale one October morning when I was running late, and something about the way the red coating caught the sunlight streaming through the kitchen windows felt celebratory. She carried the box in like she'd made them herself, and when they sold out in under an hour, I realized these simple bites had become her thing. Now whenever fall rolls around, she asks if we're making candy apple bites, which is code for let's have fun in the kitchen together.
Ingredients
- Crisp apples: Granny Smith or Fuji work beautifully because their tartness plays against the sweetness, and they hold their shape when cut into chunks.
- Granulated sugar: This is your base, and measuring it accurately matters more than you'd expect.
- Light corn syrup: This keeps the candy from crystallizing and gives you that glossy, glass-like finish everyone notices.
- Water: Just enough to get the sugar dissolved before the heat takes over.
- Red food coloring: Added at the very end when the mixture is off the heat so the color stays vivid and doesn't degrade.
- Nonstick cooking spray: A light coat on your parchment prevents sticking and saves you frustration.
- Optional toppings: Crushed nuts, mini chocolate chips, or sprinkles go on while the coating is still slightly tacky, turning each bite into something uniquely yours.
Tired of Takeout? 🥡
Get 10 meals you can make faster than delivery arrives. Seriously.
One email. No spam. Unsubscribe anytime.
Instructions
- Set your stage:
- Lay out parchment paper on a baking tray and give it the lightest mist of nonstick spray. This is your landing pad, and preparation here means less stress later.
- Prep your apples:
- Wash and dry your apples thoroughly, then core them and cut into roughly 1-inch chunks. The drier they are, the better the candy will cling.
- Load the toothpicks:
- Push a toothpick into the center of each apple chunk, standing them upright on a cutting board. This makes dipping easier and gives you something to hold.
- Build your candy mixture:
- Combine sugar, corn syrup, and water in a saucepan over medium-high heat, stirring just until the sugar dissolves. Once it comes to a boil, stop stirring and let the thermometer do the talking.
- Reach hard crack stage:
- Watch the thermometer closely until it hits 300°F, which usually takes 7 to 8 minutes. The mixture will darken slightly and smell almost nutty, which is your cue to pay attention.
- Add color and move fast:
- Remove from heat, stir in your food coloring, and work quickly because this coating sets quickly. The window is small, which is part of the thrill.
- Dip with intention:
- Hold each toothpick and swirl the apple chunk in the hot coating until fully covered, then let the excess drip back into the pot. Place it carefully on your prepared tray before the coating hardens.
- Finish while warm:
- If you're adding toppings, sprinkle them on immediately after dipping while the coating is still slightly sticky. Once it hardens, the moment has passed.
- Cool completely:
- Give them time to set at room temperature, which usually takes 15 to 20 minutes. Patience here pays off with a satisfying crunch.
 Pin it
 There's something small but genuine that happens when you hand someone one of these and watch their face change as they crack through that hard candy shell to find the tart apple waiting inside. It's the kind of moment that makes you feel like you know something about bringing people joy, even if it's just through a dipped fruit on a toothpick.
The Art of Timing
Getting the candy to exactly 300 degrees is where this recipe either becomes magic or becomes a lesson in starting over. I learned this the hard way one winter afternoon when I ignored my thermometer and pulled the pot off heat too early, ending up with a chewy coating instead of that satisfying glass-like crunch. Now I clip my thermometer to the side of the pan and check it religiously, because those few degrees make all the difference between a bite that shatters in your mouth and one that feels rubbery.
Why Apples Are the Perfect Canvas
The slight tartness of apples cuts through sugar in a way that keeps these from feeling cloying, even though they're essentially candy. Their firm texture also means they don't get mushy when impaled with a toothpick, and their natural moisture creates a contrast with the dry, hard candy that makes eating them more interesting than you'd expect.
Customization and Storage
The beauty of this recipe is how easily it becomes yours once you understand the basic technique. You can experiment with colors, toppings, and apple varieties to keep things fresh, and they stay crisp and delicious at room temperature for several hours, making them perfect for advance party prep.
- Store them in an airtight container at room temperature, not in the refrigerator, or the candy will turn sticky and lose its crunch.
- You can make the candy coating up to an hour in advance and reheat it gently if needed, though fresh is always best.
- Green food coloring gives you a holiday twist, and mixing in crushed hard candy instead of sprinkles adds another layer of texture.
 Pin it
 These little bites have a way of making any moment feel slightly more special, whether you're sneaking one before a party or watching someone taste one for the first time. There's real pleasure in something so simple that feels completely homemade.
Recipe FAQs
- → What type of apples work best?
Crisp varieties like Granny Smith or Fuji provide a firm texture and tartness that balance the sweetness of the candy coating.
- → How do I prevent the candy coating from sticking?
Ensure apples are thoroughly dried before dipping and use parchment paper lightly sprayed to prevent sticking once coated.
- → Can I add toppings to the candy coating?
Yes, sprinkle chopped nuts, mini chocolate chips, or sprinkles onto the coating immediately after dipping while still warm.
- → What temperature should the candy reach?
Bring the sugar mixture to a hard crack stage, approximately 300°F, for a firm and glossy coating.
- → Is there a way to customize the candy color?
Adding red or green food coloring to the candy mixture allows for festive variations to suit different themes.