 Pin it
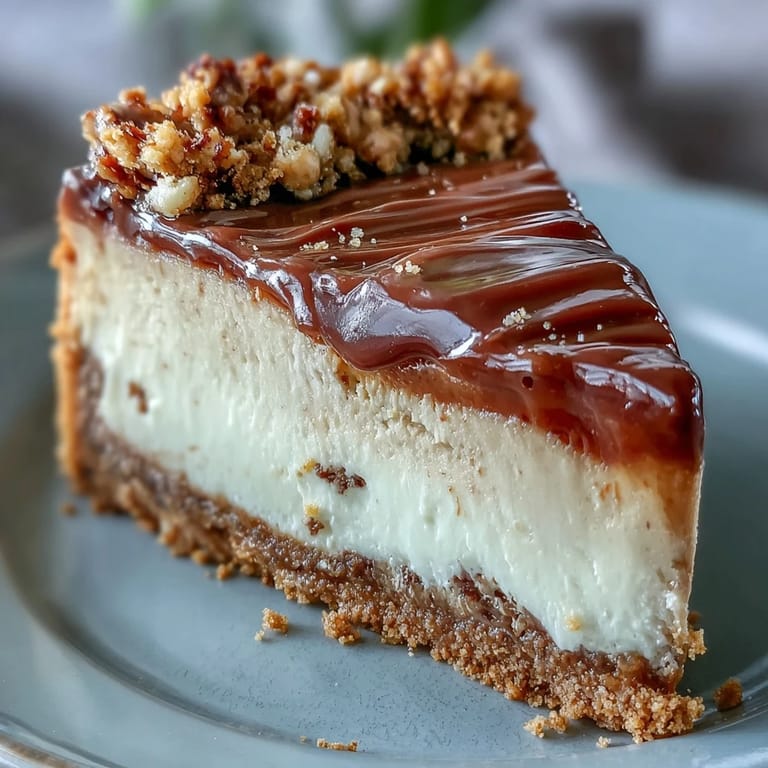
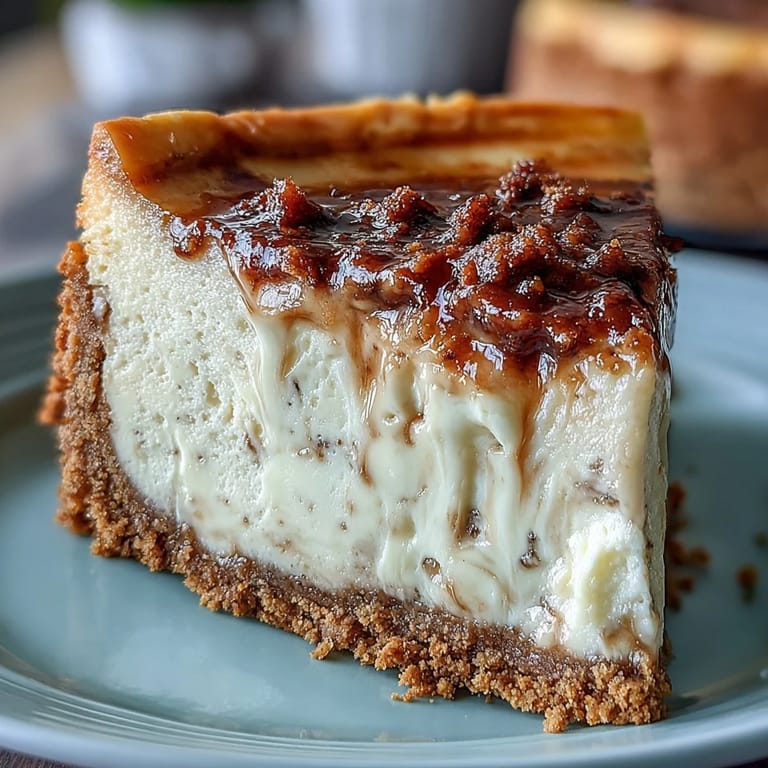
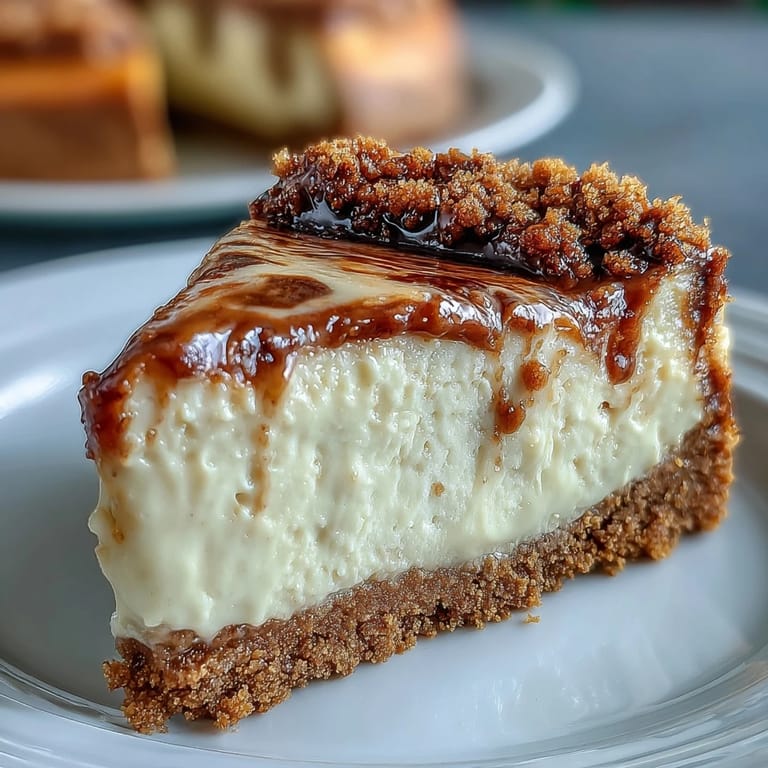
 My first encounter with hojicha cheesecake happened at a small café tucked between Tokyo's narrow streets, where the owner served it with a knowing smile—as if she'd been waiting for someone to truly appreciate it. The earthy, toasted notes of the tea swirled through that impossibly creamy filling, and I spent the train ride home thinking about how to recreate it in my own kitchen. What started as chasing a memory became something entirely personal: my version, with its buttery graham cracker foundation and those moody hojicha ribbons running through pale cream. Now when I make it, people ask why it tastes different from any other cheesecake they've had, and I never quite know how to explain the quiet elegance of roasted tea.
I baked this for a small dinner party one autumn evening, and watching my guests take that first bite in silence felt like witnessing something sacred. Someone asked if I'd used real hojicha tea or if it was some kind of flavoring, and the fact that they noticed the authenticity mattered more than any compliment. That night taught me that desserts aren't just about sweetness; they're about the story you're confident enough to serve.
Ingredients
- Graham cracker crumbs (200 g): These form your foundation, and honestly, pressing them firmly into the pan makes all the difference—a loose crust will shift during baking and ruin your clean edges.
- Unsalted butter (90 g melted): This binds everything together, and using unsalted means you control the salt entirely, which matters when you're pairing with delicate hojicha.
- Granulated sugar (2 tbsp for crust): Just enough to add texture and subtle sweetness to the crust without competing with the filling.
- Salt (pinch): A tiny amount awakens the graham cracker flavor and balances the sweetness that follows.
- Hojicha loose leaf tea or tea bags (2 tbsp): This is your star ingredient—look for quality roasted green tea, and don't skimp; cheaper hojicha can taste dusty or bitter.
- Heavy cream (120 ml for hojicha mixture): The fat carries the tea flavor beautifully, and steeping it properly extracts those toasty, almost nutty notes.
- Cream cheese (450 g softened): Temperature matters here; cold cream cheese creates lumps that no amount of beating can fix, so leave it on the counter for an hour.
- Granulated sugar (150 g for filling): This sweetens without graining, and creaming it properly with the softened cheese gives your final texture that cloud-like quality.
- Large eggs (2): These set the structure, and adding them one at a time prevents overmixing, which can incorporate too much air and cause cracks.
- Sour cream (120 ml): This adds tang and moisture, keeping the cheesecake from drying out during its long bake and creating that tender crumb.
- Vanilla extract (1 tsp): A small anchor that supports the hojicha flavor rather than competing with it.
- All-purpose flour (1 tbsp): Just enough to stabilize the filling without making it dense or cake-like.
Tired of Takeout? 🥡
Get 10 meals you can make faster than delivery arrives. Seriously.
One email. No spam. Unsubscribe anytime.
Instructions
- Set your oven and prep the stage:
- Preheat to 160°C (325°F) and line your springform pan's bottom with parchment paper—this prevents leaks and makes unmolding smoother. A lower, gentler heat prevents the dreaded cracks that can split a cheesecake's surface.
- Build your crust foundation:
- Mix graham cracker crumbs, melted butter, sugar, and salt in a bowl, then press the mixture firmly into the pan's base using the bottom of a measuring cup. Bake for 10 minutes until it just sets, then let it cool completely before pouring the filling—a warm crust can cause the cheesecake to cook unevenly.
- Steep the hojicha cream:
- Heat heavy cream until it's steaming (not boiling), add your hojicha tea, cover it, and let it sit for exactly 10 minutes so the toasted tea flavor fully infuses. Strain carefully through a fine mesh strainer and let it cool to room temperature—this prevents the hot hojicha cream from cooking your filling before it even hits the oven.
- Create your silky filling base:
- Beat softened cream cheese until it's completely smooth with no lumps visible, then gradually add sugar and mix until combined and fluffy. Add eggs one at a time, beating gently after each addition, then fold in sour cream, vanilla, and flour until just combined—overmixing introduces air bubbles that create cracks.
- Prepare your swirl:
- Divide about one-third cup of plain cheesecake batter into a separate bowl and pour your cooled hojicha cream into it, stirring until the color is a beautiful, uniform tan. This concentrated hojicha batter will create those moody ribbons throughout your finished cheesecake.
- Create the marbled effect:
- Pour the plain batter over your cooled crust, then drop generous spoonfuls of hojicha batter across the top in a pattern. Using a skewer or thin knife, drag it gently through the batters in one direction, then the other, creating those elegant swirls without overmixing—less is more here.
- Bake with patience:
- Place the springform pan on a baking tray and bake for 40-45 minutes until the edges are set but the very center still jiggles slightly when you gently shake the pan. This jiggly center is key; it will continue to set as it cools and guarantees a creamy texture rather than an overbaked, dense crumb.
- Cool slowly and gently:
- Turn off the oven and crack the door open about two inches, leaving the cheesecake inside for a full hour to cool gradually. This slow descent in temperature prevents the sudden shock that causes the surface to crack as it contracts.
- Chill and set:
- Remove the cheesecake to room temperature, then refrigerate for at least 5 hours or overnight before serving—patience here yields the silky, clean texture that makes people ask for your recipe. The cold also helps the flavors meld and deepens the hojicha taste.
 Pin it
 There's a moment, usually around midnight when the house is quiet and the cheesecake is finally chilling in the dark of the refrigerator, where I feel this small sense of accomplishment. It's not just that I've made something beautiful; it's that I've captured something fleeting—that exact taste from a Tokyo café, now available whenever I want to remember it.
The Art of the Hojicha Infusion
Hojicha is green tea that's been roasted at high temperatures, which transforms its flavor profile entirely—it loses its grassy sharpness and gains this warm, almost coffee-like depth that feels both exotic and strangely familiar. When you steep it in cream instead of water, the fat absorbs the flavor more completely than water ever could, creating something rich and velvety that becomes a part of the cheesecake rather than sitting on top of it. The roasting also means hojicha has less caffeine than other teas, so you can serve this after dinner without anyone staring at the ceiling at 3 a.m.
Why Temperature Control Changes Everything
The lower oven temperature and the hour-long cool-down inside the turned-off oven aren't just steps; they're the difference between a cheesecake with a smooth, velvety surface and one with cracks running across it like a fault line. High heat bakes the outside too quickly while the inside is still soft, and when that outer edge sets before the center is ready, the stress causes the surface to split. I learned this the hard way with a batch that looked like a map of a small country by the time I pulled it out, but that failure taught me that gentleness is actually the most important ingredient in cheesecake baking.
Finishing Touches and Serving Suggestions
A simple dusting of hojicha powder on top right before serving adds visual drama and intensifies the tea flavor in each bite, making it clear this isn't an ordinary cheesecake. A dollop of unsweetened whipped cream on the side provides a cool contrast to the rich, dense filling, and it gives your guests a choice in how they want to experience each slice. Serve it cold, slice with a sharp knife dipped in hot water between cuts, and watch people pause mid-bite to really taste what's happening on their tongues.
- A light drizzle of honey or a few sliced candied ginger pieces add optional garnishes that complement the hojicha without overwhelming it.
- This cheesecake keeps beautifully in the refrigerator for up to four days, so you can make it ahead for a dinner party without stress.
- It also freezes well for up to a month if wrapped tightly, and you can thaw it slowly in the refrigerator the day before serving.
 Pin it
 Making this cheesecake is an act of patience that pays off in spades, and every time someone takes that first bite, I get to see their surprise when they realize tea can taste like comfort. It's become my signature dessert, the one people request, and I'm always happy to make it.
Recipe FAQs
- → What does hojicha taste like in cheesecake?
Hojicha adds warm, nutty notes with subtle caramel undertones that perfectly complement the creamy filling. The roasted tea flavor is milder than matcha, creating a sophisticated depth without overpowering the rich cheesecake base.
- → Can I use hojicha powder instead of tea leaves?
Yes, hojicha powder works beautifully and provides more intense flavor. Use approximately 1 tablespoon of powder, whisking it directly into the cream instead of steeping and straining. This method also creates a darker, more dramatic swirl.
- → Why does my cheesecake crack?
Cracks typically occur from overbaking or cooling too rapidly. The center should still be slightly jiggly when removed from the oven. The gradual cooling method—leaving the door cracked for an hour—helps prevent temperature shock that causes cracking.
- → How long should I chill before serving?
Refrigerate for at least 5 hours, though overnight chilling yields the best texture and flavor. The filling firms up nicely during this time, making clean slices easier. The flavors also meld together, creating a more harmonious taste.
- → Can I substitute the crust?
Digestive biscuits work well as a British alternative, or vanilla wafers for a lighter option. For a gluten-free version, use almond flour mixed with a binder. Press any crust variation firmly and bake before adding the filling.