 Pin it
 The first time I made potato chips at home, I couldn't believe how simple it actually was—no deep fryer, no oil splattering everywhere, just a mandoline, an air fryer, and about twenty minutes. My kitchen didn't smell like a chip factory afterward, which felt like winning the lottery. What started as an attempt to satisfy a late-night snack craving turned into discovering that homemade chips taste infinitely better than anything from a bag, with a crunch that's almost impossible to stop eating. Now I make them constantly, especially on weekends when I want something that feels indulgent but doesn't require much effort or skill.
I remember my sister visiting and arriving early, catching me pulling a batch of golden chips from the air fryer. She grabbed one off the cooling rack without asking and her expression shifted instantly—that moment when you taste something and realize it's real homemade food, not a shortcut. We ended up making three more batches that afternoon while she told me about her new job, and by the end we'd experimented with different seasonings and basically forgotten about dinner. That afternoon taught me these chips aren't just snacks; they're an invitation to slow down and share something warm with someone.
Ingredients
- 2 large russet potatoes: These starchy potatoes crisp up beautifully and have the right texture for chips that shatter when you bite them—waxy potatoes like fingerlings won't give you the same result.
- 1 tablespoon olive oil: Just enough to coat the slices and help them crisp, without making them greasy like deep-fried versions.
- ½ teaspoon fine sea salt: The fine grain dissolves evenly across the thin slices, so you get consistent seasoning in every bite.
- ¼ teaspoon freshly ground black pepper (optional): Adds a subtle warmth that makes people ask what you did differently.
- ¼ teaspoon smoked paprika (optional): This is my secret weapon when I want the chips to feel slightly fancier without much extra work.
Tired of Takeout? 🥡
Get 10 meals you can make faster than delivery arrives. Seriously.
One email. No spam. Unsubscribe anytime.
Instructions
- Prepare the potatoes:
- Scrub them under cold water and peel if you prefer, though I usually leave the skin on for texture. Using a mandoline, slice them as thinly as you can—aim for about 1.5 mm thick—because this is what determines whether you get chips or just lukewarm potato rounds.
- Soak and dry:
- Place the slices in a bowl of cold water and let them sit for 10 minutes; this pulls out starch that would otherwise make them soggy. After draining, pat them completely dry with paper towels—any water left behind will steam instead of crisp in the air fryer.
- Season generously:
- Toss the dried slices with olive oil and your salt and optional spices, making sure each slice gets coated. This step only takes a minute but determines your flavor outcome, so don't skip it.
- Heat and arrange:
- Preheat your air fryer to 180°C (360°F) for 3 minutes, then layer the potato slices in a single flat layer—they need air circulation all around them to crisp evenly. If your basket is full, work in batches rather than stacking.
- First cook:
- Air fry for 8 minutes, then open the basket and flip or shake it so the chips cook evenly on both sides. You'll start smelling that irresistible toasted potato aroma at this point.
- Finish crisping:
- Cook for another 6 to 8 minutes until they're golden brown and the edges curl slightly when you look at them. The exact time depends on your air fryer and how thin you sliced, so check at 6 minutes if this is your first time.
- Cool and store:
- Transfer the chips to a wire rack and let them cool completely—they actually crisp up even more as they cool, which is the magic part. Once cool, eat them fresh or store in an airtight container.
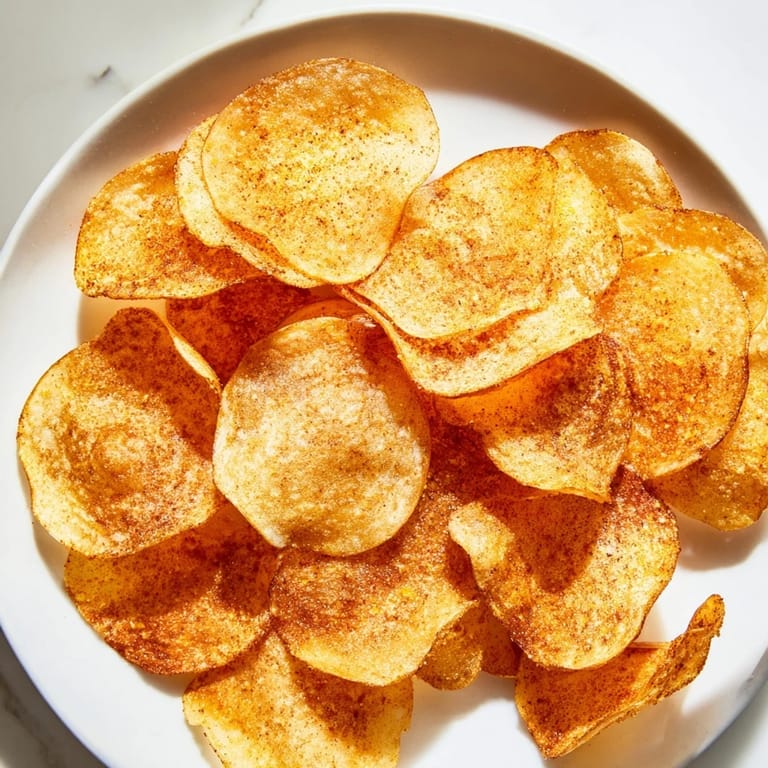
 Pin it
 There's something almost meditative about watching them turn golden in the air fryer window, knowing you're about to have a snack that tastes like a treat but actually required almost no skill. These chips have become my go-to when I want to feel like I've done something special in the kitchen without the stress or cleanup of traditional frying.
Flavor Variations That Work
Once you master the basic recipe, the seasoning possibilities expand quickly and each version feels like its own discovery. I've sprinkled garlic powder and a pinch of cayenne right before serving for a spicy kick, tossed some with nutritional yeast for a cheesy vibe, and even tried dusting them with a tiny bit of curry powder mixed with the salt for something completely different. The key is adding any extra seasonings either before cooking or immediately after while they're still slightly warm, because they won't stick to completely cooled chips.
The Mandoline Question
If you don't have a mandoline slicer, a very sharp knife works, but honestly you'll spend twice as long and your slices probably won't be as consistent. After my first batch with a dull knife turned into uneven results, I ordered a mandoline and it genuinely changed my chip-making life. They're inexpensive and last forever, and they make slicing feel almost effortless compared to hand-slicing.
Storage and Serving Tips
Fresh chips taste best within hours of making them, but they keep reasonably well in an airtight container for up to 2 days if your kitchen isn't too humid. I've also learned that if they do lose some crispness after storing, a quick 2-minute blast in the air fryer at 160°C revives them almost completely, which is a lifesaver when you forgot about leftovers.
- Make multiple batches on a weekend and portion them into containers if you want convenient snack portions throughout the week.
- Serve them while still slightly warm from the cooling rack for maximum texture contrast and flavor impact.
- Keep the airtight container seal tight—air exposure is what makes stored chips go soft.
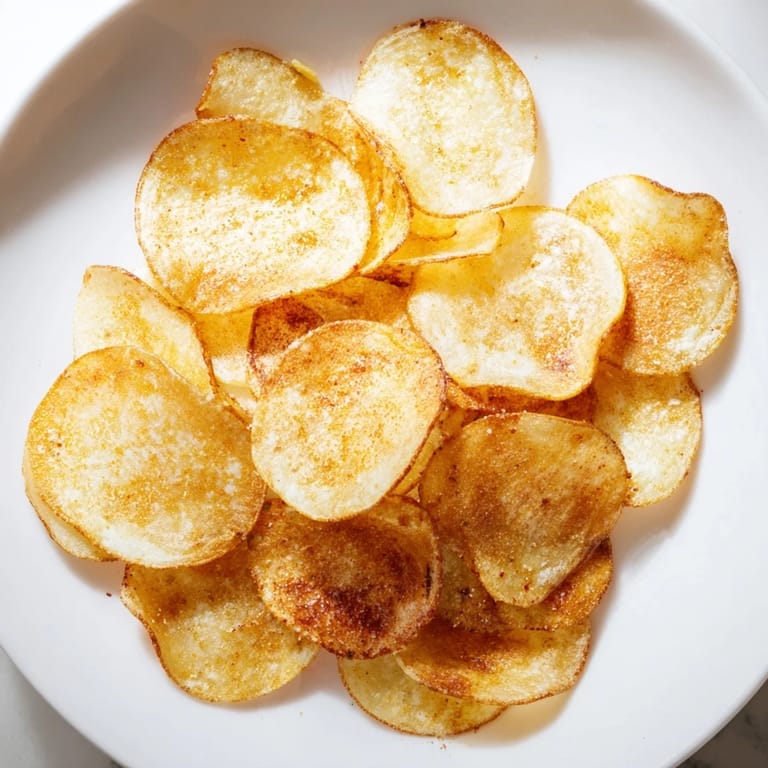
 Pin it
 There's real magic in biting into a chip you made yourself, tasting that perfect balance of crispy and salty, knowing it took almost no time or skill. Once you try homemade, store-bought chips feel forgettable by comparison.
Recipe FAQs
- → What type of potatoes work best?
Russet potatoes are ideal for crispiness, but Yukon Golds can also be used for a slightly different texture.
- → Why soak potato slices before cooking?
Soaking removes excess starch, helping the chips become crispier during air frying.
- → Can I add other seasonings?
Yes, garlic powder, chili powder, or your favorite spice blends can be sprinkled before air frying for extra flavor.
- → How thin should the potato slices be?
Slices about 1.5 mm (1/16 inch) thick ensure the chips cook evenly and get crispy.
- → How do I store leftover chips?
Once fully cooled, store chips in an airtight container for up to two days to maintain freshness.
- → Can I use a knife instead of a mandoline slicer?
Yes, but a mandoline ensures uniformly thin slices which help in even cooking and crispiness.