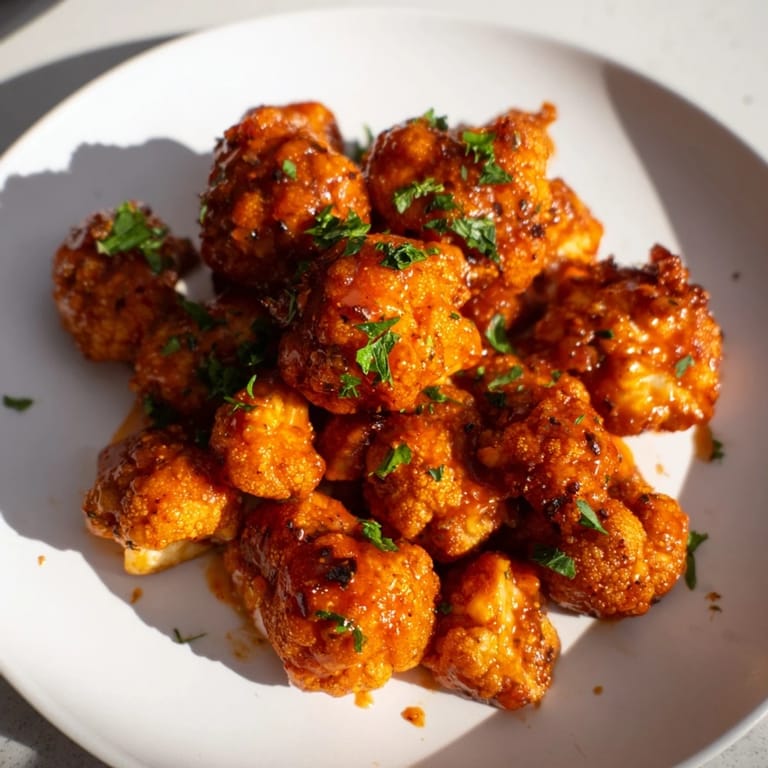
 Pin it
 I discovered these bites completely by accident while raiding my fridge before a game night, staring at a lonely head of cauliflower and thinking there had to be something better than plain roasted vegetables. The idea hit me to dip them in batter and bake them crispy, then toss them in that spicy-tangy sauce I'd been experimenting with. Twenty minutes later, my friends were fighting over the last few pieces, and I realized I'd stumbled onto something that would become my go-to move whenever people show up hungry.
I made a giant batch of these for my sister's potluck last spring, and she literally texted me the recipe request before she even left our kitchen. Watching people who'd never eaten cauliflower bites before come back for thirds was the moment I knew this recipe had staying power, especially when my brother-in-law—who complains about anything green—asked if I could make them weekly.
Ingredients
- Cauliflower florets, bite-sized: The star of the show, and the quality of your head matters more than you'd think—look for tight, pale florets without any brown spots, as they bake up crispier and won't turn mushy.
- All-purpose flour: Creates the crispy coating that holds everything together; gluten-free blends work beautifully if you need them, though I'd recommend adding an extra tablespoon of plant-based milk for texture.
- Plant-based milk: The liquid that binds everything into a cohesive batter, and oat milk tends to create a slightly thicker coating than almond if you're picky about that.
- Garlic powder and onion powder: These are doing the heavy lifting flavor-wise before the sauce even enters the picture, so don't skimp on them.
- Smoked paprika: Adds this subtle smokiness that makes people ask what's in the batter.
- Hot sauce: Frank's RedHot is the classic for a reason, but any vinegary hot sauce with good depth will work.
- Sriracha: The heat and umami component that transforms hot sauce into something special and slightly more complex.
- Vegan butter: Melted into the sauce, it rounds out all the sharp flavors and prevents the sauce from tasting too acidic.
- Maple syrup or agave: A touch of sweetness that balances the heat and vinegar, creating that addictive quality where you can't stop eating them.
- Apple cider vinegar: The secret weapon that brightens everything up and gives the sauce that signature tang you're chasing.
Tired of Takeout? 🥡
Get 10 meals you can make faster than delivery arrives. Seriously.
One email. No spam. Unsubscribe anytime.
Instructions
- Get your oven ready and set up your workspace:
- Heat your oven to 425°F and line a baking sheet with parchment paper so nothing sticks and you can flip them easily halfway through. This temperature is just hot enough to crisp the outside without burning the batter before the insides cook through.
- Make the batter smooth and even:
- Whisk flour, plant-based milk, garlic powder, onion powder, smoked paprika, salt, and black pepper together until you have no lumps and the mixture looks like pancake batter. The consistency matters here—too thick and your florets won't get fully coated, too thin and they slide right off.
- Coat every single piece:
- Toss your cauliflower florets into the batter, using a spoon or your hands to make sure each one gets fully surrounded. This step determines whether they're crispy all over or have bare spots that stay chewy.
- Bake until they start turning golden:
- Spread the battered florets in a single layer and bake for 20 minutes, flipping them halfway through with a spatula so they crisp up evenly on both sides. You're looking for them to turn a light golden color, not brown.
- Build your sauce while they cook:
- In a saucepan over low heat, whisk together hot sauce, Sriracha, melted vegan butter, maple syrup, and apple cider vinegar, stirring constantly until it's smooth and warm. Taste it while you're building it—this is when you can adjust the heat level or sweetness to match your mood.
- Toss everything together:
- Transfer the baked cauliflower to a large bowl and pour the warm sauce over it, stirring gently until every piece is coated. The residual heat will help the sauce stick.
- Give them one final crisping:
- Return the sauced bites to the baking sheet and bake for another 10 minutes, which lets the sauce caramelize on the outside and firms up the coating. The edges should look slightly crispy and a little darkened, which is exactly what you want.
- Serve while they're still hot:
- Garnish with fresh parsley or chives and serve alongside vegan ranch, celery sticks, or carrot sticks for dipping and cooling down between bites. They're best eaten right away, but leftovers will reheat fine in a 350°F oven for about five minutes.
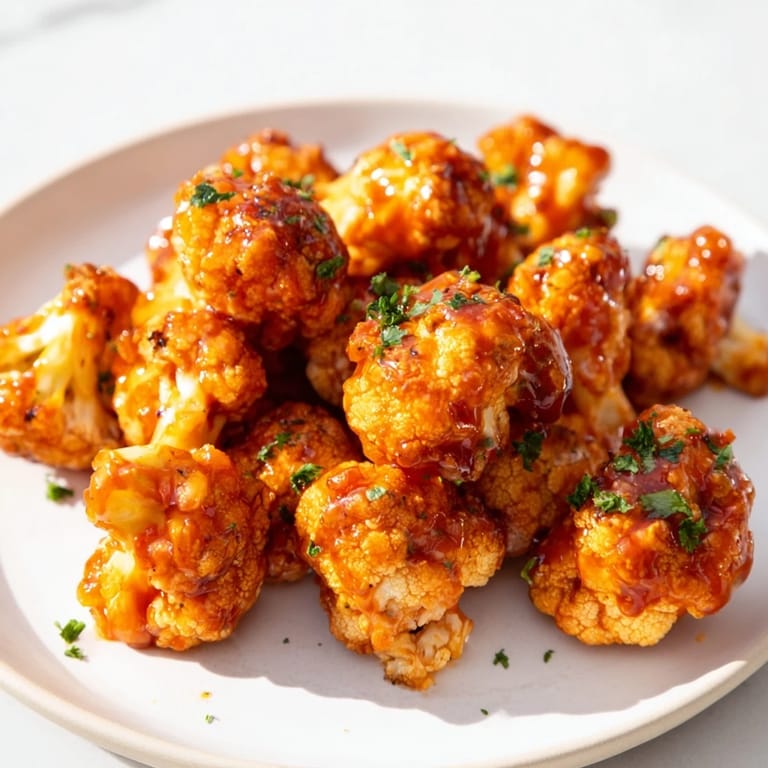
 Pin it
 There was this moment last summer when I made these for my best friend who'd just gone vegan, and she bit into one with this skeptical expression that completely melted the second the heat and crunch hit her. She actually teared up a little and said, "I didn't think I'd miss eating like this," and that's when I understood these bites were about more than just food—they were proof that vegan eating doesn't mean sacrifice.
Why the Sauce is the Star
I spent weeks tweaking the sauce ratios before landing on this blend, and the turning point came when I added the apple cider vinegar. That acid cuts through the richness of the butter and the heat of the Sriracha, creating this complex flavor that keeps evolving as you eat. The maple syrup isn't just sweetness—it's also what helps the sauce stick to the batter and creates those caramelized edges that people actually fight over.
Storage and Reheating Tips
These hold up surprisingly well in the refrigerator for three to four days if you store them in an airtight container, though they're honestly best the day you make them. Reheating them in a 350°F oven for five to seven minutes restores most of the crispiness, and if you're feeling creative, you can toss them in extra sauce before serving again.
Variations and Flavor Combos
Once you master the base recipe, this becomes your template for experimenting with different sauces and coatings. I've made versions with a Korean gochujang twist, a barbecue glaze version that my dad preferred, and even a honey-chipotle situation that surprised everyone at a dinner party. The batter technique is solid, so the real fun is in playing with whatever sauce you're craving that week.
- Try swapping hot sauce for barbecue sauce or teriyaki for completely different vibes.
- Add a teaspoon of garlic to the sauce if you want it to lean more savory and less spicy-forward.
- Experiment with different fresh herbs like cilantro or basil for garnish depending on which sauce direction you choose.
 Pin it
 These bites have become my secret weapon for feeding a crowd without stress, and they've converted more people to plant-based eating than I ever expected. Once you taste how good they can be, you'll understand why everyone keeps asking for the recipe.
Recipe FAQs
- → What is the best way to achieve crispy cauliflower bites?
Coating the cauliflower in a well-seasoned batter and baking at a high temperature ensures a crispy exterior. Flipping halfway helps even cooking.
- → Can I make this dish gluten-free?
Yes, substitute all-purpose flour with a certified gluten-free flour blend without altering the preparation method.
- → How can I adjust the spice level in the sauce?
Vary the amount of Sriracha or hot sauce to suit your heat preference, adding more for extra spice or less for a milder flavor.
- → Is there an alternative cooking method besides baking?
Air-frying the battered florets at 400°F for 15–20 minutes provides a crispy texture, with an additional 5 minutes after saucing for caramelization.
- → What accompaniments pair well with these bites?
Fresh celery and carrot sticks along with vegan ranch or blue cheese-style dips complement the spicy cauliflower bites nicely.
- → How to store leftovers for best freshness?
Keep leftover bites in an airtight container in the refrigerator and reheat in the oven or air fryer to restore crispiness.